New Builds, Remodels, & Additions: Call Us for a Home Transformation!
Request Consultation
Transforming Your Space: A Step-by-Step Guide to Removing Popcorn Ceilings
Popcorn ceilings, also known as acoustic ceilings, were a popular choice in homes built from the 1950s to the 1980s for their ability to hide imperfections and provide sound insulation. However, today's homeowners often prefer a more modern and sleek look. Removing popcorn ceilings can significantly update the feel of your home and increase its value. As the owner of HoneyB Construction, I've guided many homeowners through this process. Here's a comprehensive guide to help you safely remove your popcorn ceiling, apply a new texture, and prepare for painting.
Step 1: Preparation
- Clear the Room: Remove furniture and cover the floors and any remaining items with plastic sheeting to protect them from dust and debris.
- Safety Gear: Wear protective eyewear, a dust mask, and gloves to safeguard against potential asbestos and falling debris.
- Test for Asbestos: If your home was built before 1980, it's crucial to test the ceiling for asbestos. If asbestos is present, it's best to hire a professional for removal.
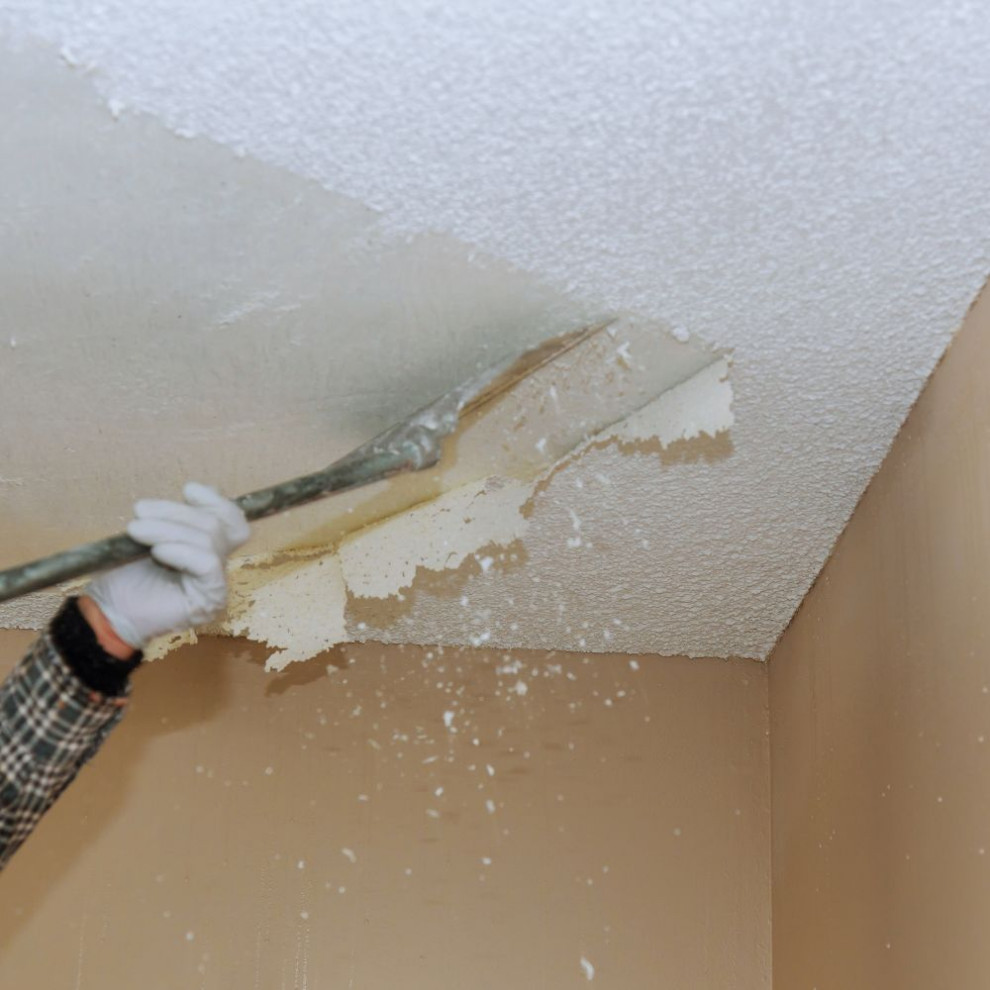
Step 2: Removing the Popcorn Texture
- Wet the Ceiling: Use a garden sprayer to lightly mist the ceiling with water. This will help soften the texture and reduce dust.
- Scrape the Texture: Using a wide putty knife or ceiling texture scraper, gently scrape away the wet popcorn texture. Work in small sections and be careful not to gouge the drywall.
- Clean Up: Once the texture is removed, clean the ceiling with a damp cloth to remove any residual dust or particles.
Step 3: Repairing and Smoothing the Ceiling
- Patch and Sand: Fill any holes or gouges with joint compound and let it dry completely. Sand the ceiling smooth, starting with a coarser grit sandpaper and finishing with a finer grit.
- Prime the Ceiling: Apply a coat of primer to the ceiling. This will help seal the drywall and provide a good base for the new texture.
Step 4: Applying New Texture
- Choose Your Texture: Decide on the type of texture you want for your ceiling. Popular options include knockdown, orange peel, or smooth finish.
- Apply the Texture: For knockdown or orange peel textures, use a texture sprayer or roller to apply the texture compound. For a smooth finish, apply a thin layer of joint compound and smooth it with a drywall knife.
- Let It Dry: Allow the texture to dry completely according to the manufacturer's instructions.
Step 5: Preparing for Paint
- Final Sanding: Lightly sand the textured ceiling to remove any rough spots and ensure an even surface.
- Clean the Ceiling: Wipe down the ceiling with a damp cloth to remove any dust from sanding.
- Prime Again: Apply another coat of primer to ensure the paint adheres well to the new texture.
Step 6: Painting
- Choose Your Paint: Select a high-quality ceiling paint in your desired finish.
- Apply the Paint: Using a roller with an extension pole, apply the paint in smooth, even strokes. Apply a second coat if necessary for full coverage.
Don't want to get messy? Call HoneyB today!
Removing a popcorn ceiling and applying a new texture is a project that can dramatically change the look of your home. While it requires some effort and patience, the result is a modern and updated ceiling that can enhance the overall aesthetic of your space. If you're not comfortable tackling this project on your own, or if you encounter asbestos, it's important to seek professional help. At HoneyB Construction, we're experienced in ceiling renovations and can help you achieve the smooth, textured, or painted ceiling you desire.